Showing posts with label birthdays. Show all posts

June 3, 2012

cute as a button...

for the love of a hot glue gun.  as {tacky} as it may be, it truly makes a world of difference with some things... and, really, is a one-year-old going to be able to tell?


now, i had seen some similar things to this on pinterest, but they were all super complicated and required way too many materials and prep.  so, i can honestly say i have not found something that is exactly like the way i did things here...

crafty necessities {yields: one happy birthday girl}
5 x 7 frame, i'd recommend black or white depending on your colors
1 sheet of card stock to back the letter
wooden letter of choice
embellishments
hot glue gun
acrylic paint of choice


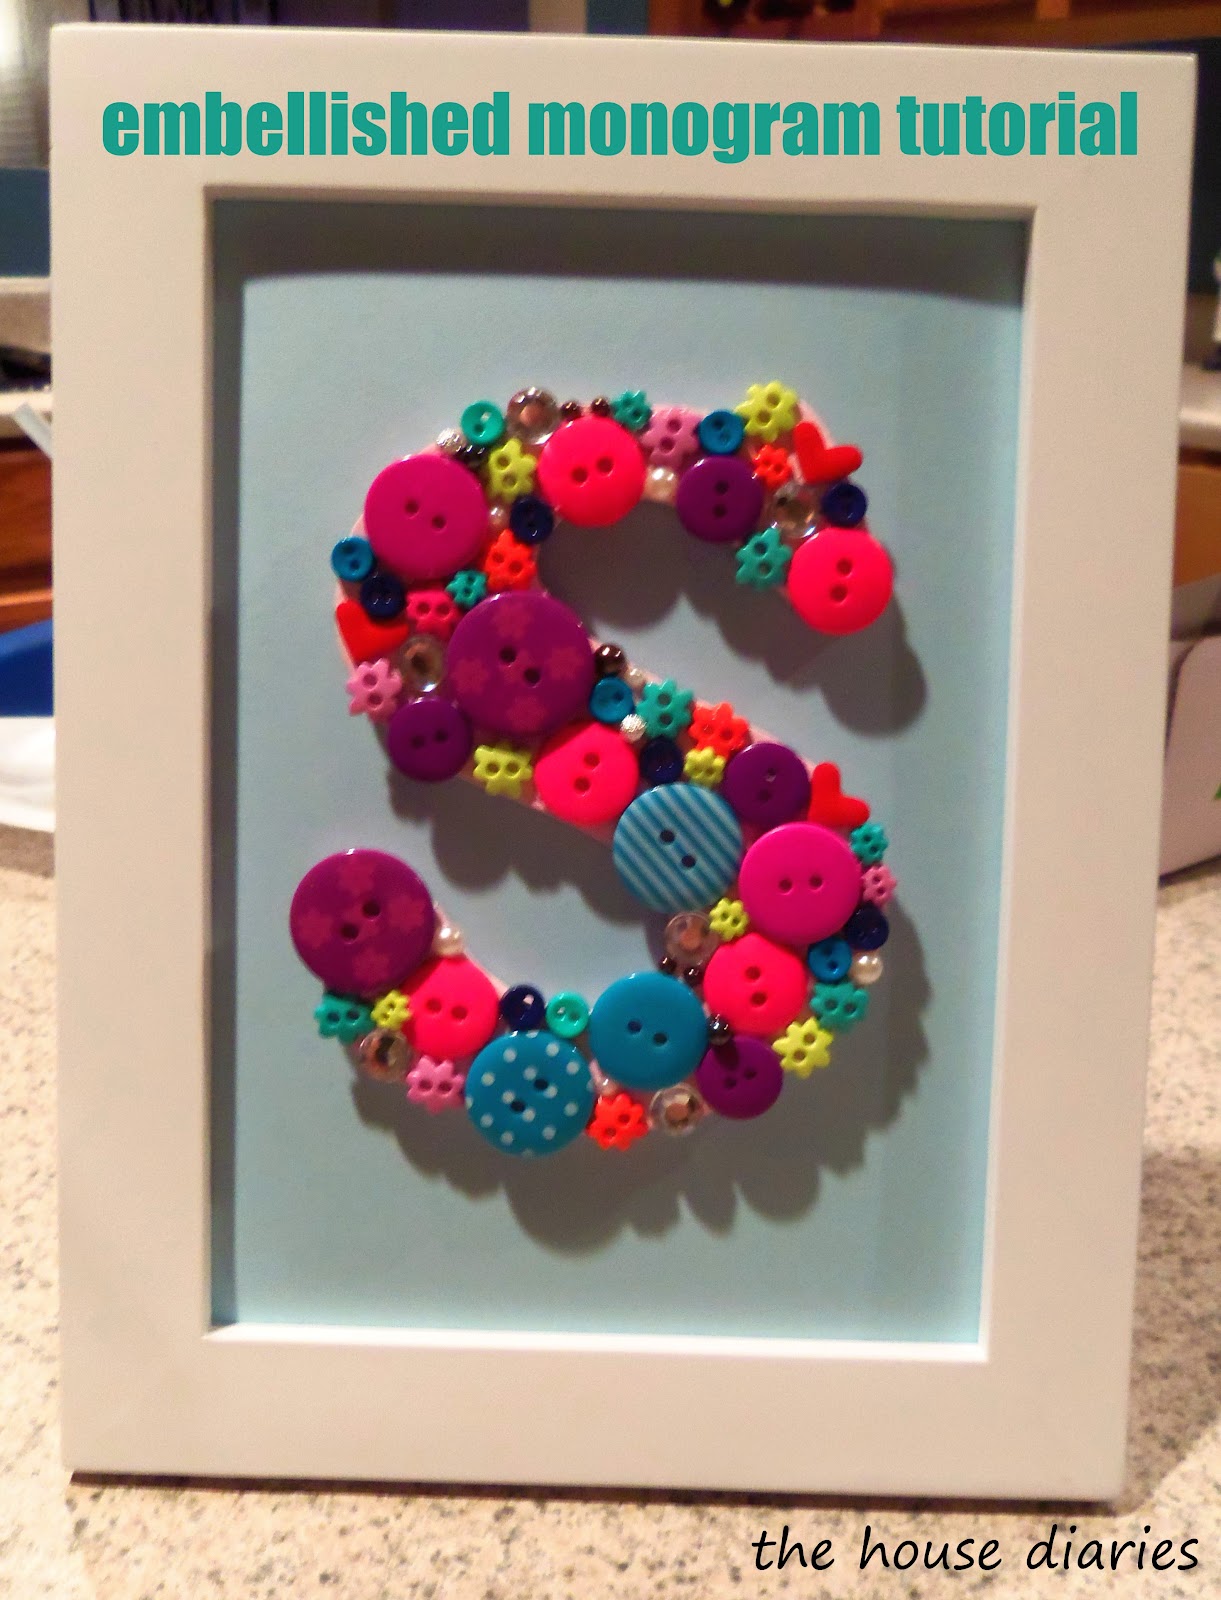
i painted my letter a very pale pink, as i figured there would be little pops of color that would show through in between the embellishments.  i chose mainly buttons in different colors, shapes and sizes, as well as some rhinestones and 3D stickers and beads.


i started by hot gluing the biggest buttons down, and then went from there.  a toothpick came in real handy to get the smaller buttons into tough spaces and push down to secure them without singeing my fingertips off {i had just gotten a fresh manicure after all!}.  i used tiny beads to fill smaller holes and give the letter a little more "bling," because miss samaira is one fancy lady!


once the entire letter was filled, i glued it onto a light blue piece of card stock and placed it in my frame.  you don't use the glass for this project, and it gives the frame a nice "pop-out" look.  i did reinforce the letter with some extra cardboard to make sure it wasn't flimsy...


 and there we have it!  i thought about decorating the frame itself, but didn't want to distract from the monogram; overall i think it turned out awesome!!! it was also fairly inexpensive, and only cost me about $20 for all the supplies; craft on people!

through the lollipop forest...

as usual at this blog, a birthday is a great excuse to get crafty.  it's even better when the birthday is for a one-year-old, because then the sky is the limit!  one of my best friend's daughter was turning one, and she spared no expense or creative genius to give her an amazing birthday.  the party was Candyland themed, and cute as ever!  we had an awesome time making fun food and decorating, and the party was a huge success...


cake pops, chocolate dipped marshmallows, candied oreos and smore pops!

there were 6 different gourmet cupcakes!


these were some of the cupcake cards i made to label each flavor

now, naturally i cannot attend a birthday anymore without a lovely craft in hand.  see my next post to find out what i made for samaira!


April 8, 2012

knot your average tutu...

omg guys. my craft skills {and i use that term loosely} continue to expand! my dear friend venessa had asked me to help make her beautiful daughter a tutu for her first birthday.  she found an amazingly helpful tutorial at mammalicious finds that we attempted {quite successfully} to replicate on our own...

it is with great pride i present to you:

 the "knotty" tutu tutorial!

crafty necessities {yields 1+ tutus}:
3 spools of tulle {25 ft each}, minimum
1" wide elastic 
sewing kit

the entire project cost us only about $25, which isn't too bad considering what these babies go for online and in specialty stores!  we ended up purchasing pink, aqua and purple tulle, plus 2 smaller spools of glitter tulle for added flare; this is a first birthday after all!

we used this handy trick from treasures for tots to cut the tulle.  we decided we wanted about an 8" long tutu, so we doubled the amount of tulle and added 2 inches {18" total for those who can't add like me}.


measuring a squirmy baby's waist proved less simple, but that is the easiest way to determine how much elastic you will need.  the original tutorial said not to stretch it, but we found that the more tulle we added to the elastic, it naturally stretched it out; in this case, i would pull the elastic slightly taut for your measurement.


then we starting knotting away!  use a simple knot tying in opposite directions to form a "pretty" knot {i.e., tie it once left to right, then up and down to form the knot}.  we then rotated the tulle so that the knot was on the bottom of the elastic waistband.


we continued in this fashion, alternating colors and intermittently throwing in some glittery pieces...


we did push the knots closely together to get more fullness in the tutu, and this is what caused the elastic to stretch out; we ended up having to sew an overlapping piece together to get it to fit correctly...


how cute is this thing?! it only took us about 2 hours to put it all together, which isn't bad for the first time... 

i think there is going to be one very adorable and colorful 1 year old who will be very excited to get cake all over our hard work!

April 1, 2012

meet my new friend, modge podge...


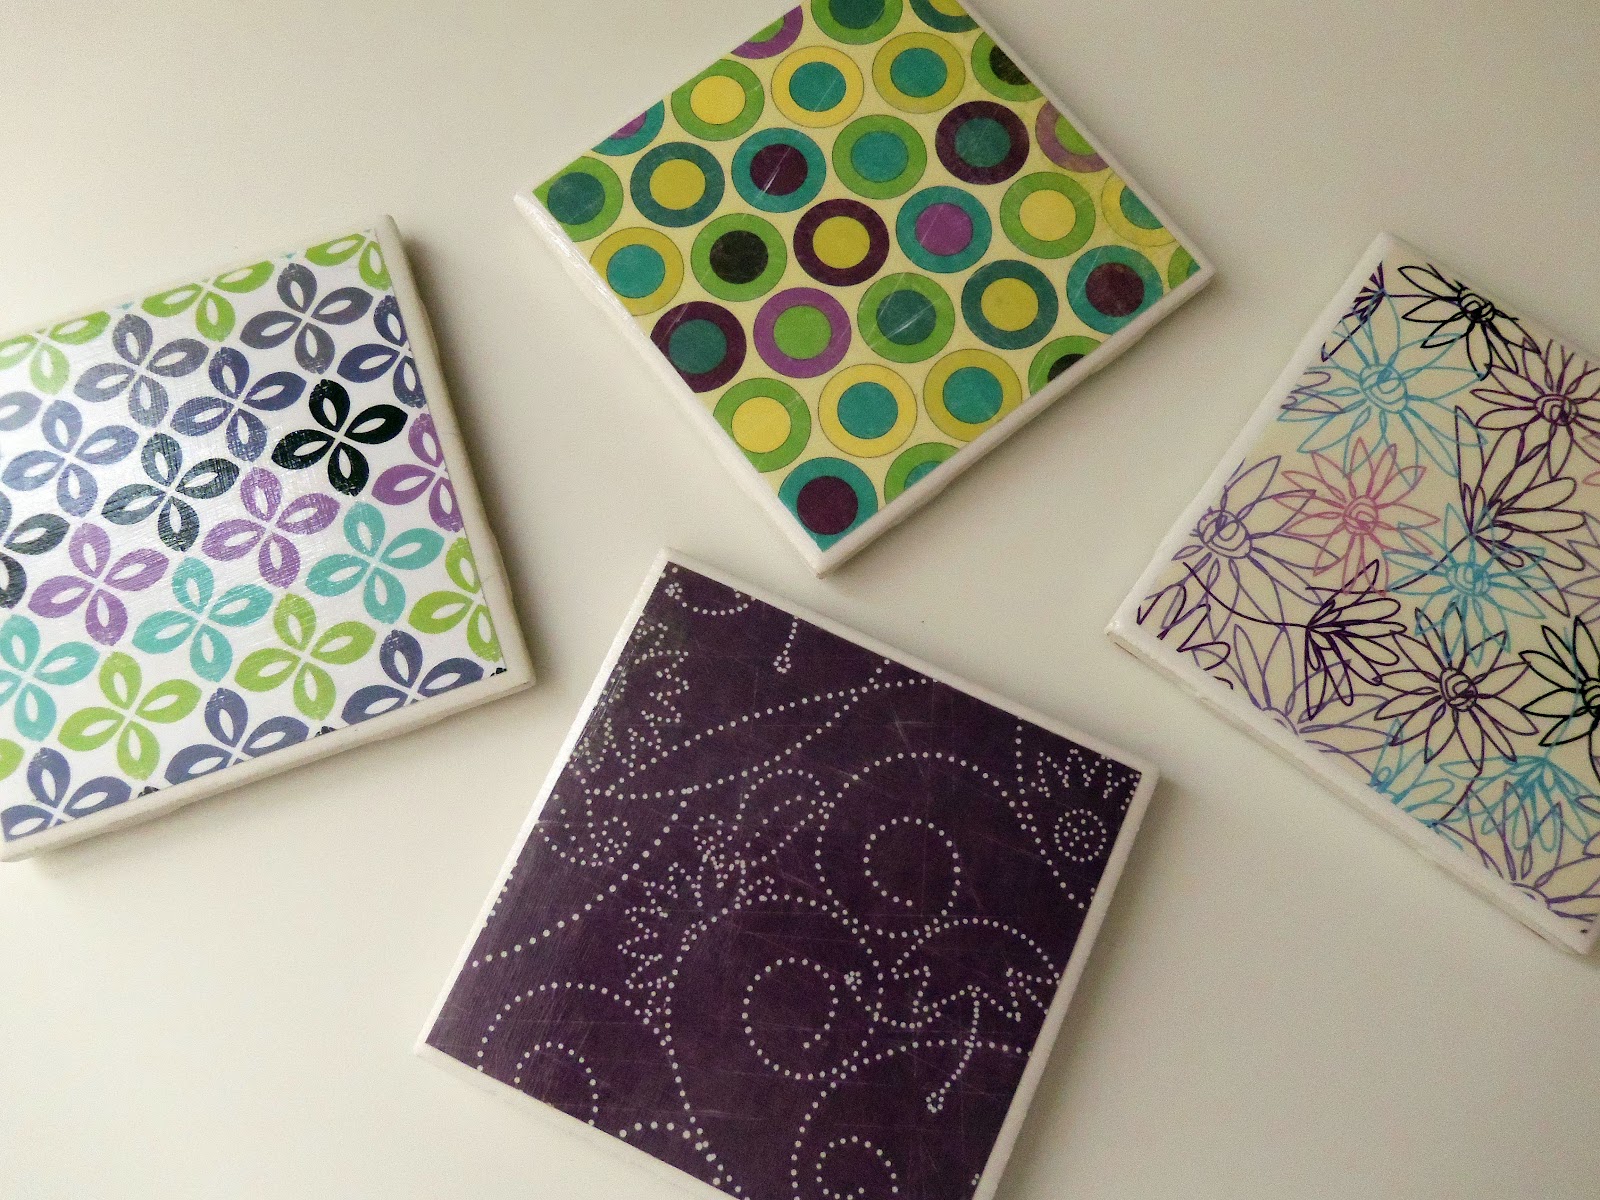
like i was saying in my popcorn post, i've been using others' special occasions as an excuse to craft and cook!  earlier in the year i attempted tile coasters for my bestie amanda's birthday! however {like a true noob} didn't take a single photograph to showcase my minor victory over the DIY world.  so naturally, i made more!  i credit Jordan over at blueprint crafts for the original tutorial, and you can see her lovely work over at her blog!

crafty necessities {for 4 coasters}:
4 white ceramic tile coasters {home depot for $.16!}
4 sheets of scrapbook paper of your choice {also uber cheap}
modge podge {$4.99 @ hobby lobby}
clear acrylic spray, glossy coat {$5.99 @ hobby lobby}
16 felt backings
sponge brush


rinse and dry your tiles.  cut the scrap book paper into 4x4 sqaures; the tiles i used were about 4.25x4.25 and i wanted a slight white edge.  using the sponge brush, apply a thin layer of modge podge to the tile then place the paper over it.  smooth out any air-bubbles to the best of your ability; apply another thin layer of modge podge on top of the paper, coating evenly.


repeat this with the remaining tiles; you will apply 2-3 more layers of modge podge to each coaster, waiting at least 15 minutes between coats.  once completely dry, apply the felt backings to each corner of each tile.  let the tiles sit overnight, then the next day apply an even layer of acrylic spray to each tile to seal them completely.  and voila, a super-cute and thoughtful hand-made gift!


i brought the pink and green coasters featured above to my friend kiera for her birthday, and now she wants to learn how to make them too!  i wrapped them up with a bit of ribbon and brought them over to her place for a birthday celebration {with my cake batter popcorn in tow} with some of our friends.


not too shabby i say...

March 22, 2012

and a birthday for all my friends

drew and i have the pleasure of being born a mere eight days apart, and that makes for a significant amount of celebrating in a short amount of time. needless to say, we did 25 up right this year and i had the privilege {yet again} of dating an older man for a week...


we celebrated both of our birthdays at the place where everyone knows your name, and also realized that we cannot drink like we used to.  the week also brought some new experiences for the both of us as boyfriend moved into the lovely house on Orchid Lane.  however, despite the presence of another male in the home {and yes, barkley counts}, i received a wonderful little surprise to keep the girly-girl essence alive and well...


how cute is this keep calm and CARRIE on sign from my dearest amanda?  it fully completed the blank section on my sex and the city devoted shelf in my living room.  but she didn't stop there ladies and gentlemen, my crafty bestie topped it off with a DIY chalkboard plate platter that is now stylishly displayed atop my fridge...


after the birthday season officially rounded out with some grimaldi's pizza and excessive adult beverages, it was back to the real world...

oh ikea, how we love and loathe you...