June 7, 2012

pomp and circumstance...


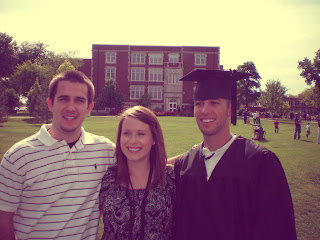
well, we all know what this means.  gotta go to salina.  truth be told i had been avoiding this town like the plague; if it weren't for instant streaming, live broadcasts and live stats of matthew's baseball games i may have ended up there a lot sooner.  but clearly, for this event i made an exception.  the trip itself was no small feat, and i still feel my brother should have paid me to attend given the conditions and situations i had to endure, but that is besides the point.  after three near-death experiences, a couple cumbersome car rides and a nausea-inducing flight, i finally made it to witness said graduation...


we're real proud of you, kid.  
can't wait to see your face on ESPN one day! ♥

but seriously, i'm never going back there...

June 3, 2012

cute as a button...

for the love of a hot glue gun.  as {tacky} as it may be, it truly makes a world of difference with some things... and, really, is a one-year-old going to be able to tell?


now, i had seen some similar things to this on pinterest, but they were all super complicated and required way too many materials and prep.  so, i can honestly say i have not found something that is exactly like the way i did things here...

crafty necessities {yields: one happy birthday girl}
5 x 7 frame, i'd recommend black or white depending on your colors
1 sheet of card stock to back the letter
wooden letter of choice
embellishments
hot glue gun
acrylic paint of choice


i painted my letter a very pale pink, as i figured there would be little pops of color that would show through in between the embellishments.  i chose mainly buttons in different colors, shapes and sizes, as well as some rhinestones and 3D stickers and beads.


i started by hot gluing the biggest buttons down, and then went from there.  a toothpick came in real handy to get the smaller buttons into tough spaces and push down to secure them without singeing my fingertips off {i had just gotten a fresh manicure after all!}.  i used tiny beads to fill smaller holes and give the letter a little more "bling," because miss samaira is one fancy lady!


once the entire letter was filled, i glued it onto a light blue piece of card stock and placed it in my frame.  you don't use the glass for this project, and it gives the frame a nice "pop-out" look.  i did reinforce the letter with some extra cardboard to make sure it wasn't flimsy...


 and there we have it!  i thought about decorating the frame itself, but didn't want to distract from the monogram; overall i think it turned out awesome!!! it was also fairly inexpensive, and only cost me about $20 for all the supplies; craft on people!

through the lollipop forest...

as usual at this blog, a birthday is a great excuse to get crafty.  it's even better when the birthday is for a one-year-old, because then the sky is the limit!  one of my best friend's daughter was turning one, and she spared no expense or creative genius to give her an amazing birthday.  the party was Candyland themed, and cute as ever!  we had an awesome time making fun food and decorating, and the party was a huge success...


cake pops, chocolate dipped marshmallows, candied oreos and smore pops!

there were 6 different gourmet cupcakes!


these were some of the cupcake cards i made to label each flavor

now, naturally i cannot attend a birthday anymore without a lovely craft in hand.  see my next post to find out what i made for samaira!


my continued affair with spicy food...

i've been busy on my hiatus, and again apologize for the lack of posts.  however, i've moved into a new position {and thus a new office}, purchased a car and have been losing my weekends to graduations and cleaning.  but nonetheless, i promised to deliver some more amazingness to this blog, and now i give you...

{those beans are from a can, i'm not that good...}

like always, this recipe is an adaptation from a recipe found here, and i adjusted the ingredients according to my preference.  i've been on such a spicy food kick, and literally plan my meals lately around jalapenos... it's sad.

this recipe was super easy to make and {i think} was even better the second day!  here is what you need to do to create this super amazing dinner...

recipe necessities {yields 4 chicken breasts}:
4 boneless, skinless chicken breasts
spices of your choice {i used onion powder, garlic salt, black pepper, cayenne pepper, seasoning salt and cumin}
bacon, 4 slices, cooked and chopped
sour cream
jalapenos {i used nacho jalapenos from a jar}, diced
taco seasoning
shredded cheese, mexican blend
olive oil


combine any spices you want, literally in any amount, and dredge your chicken in the mixture.  then, you will want to sear the chicken on both sides in olive oil over a hot pan.  you can also cook your bacon during this time {make it crispy!}


while the chicken is searing, take the sour cream, diced jalapenos, bacon and taco seasoning and combine it to make a thick, creamy sauce.  i also added a bit of jalapeno juice to it...


then, once the chicken is done, place it in a pre-sprayed baking dish. place a generous amount of the sauce on top of each chicken breast, and then smother with cheese.


now you will want to bake these beauties in the oven at 375 degrees for about 15-25 minutes depending on the thickness of your chicken. once they are done, serve with a side of mexican rice or refried beans and an ice cold margarita... yumm!