August 9, 2012

beaded glory...

while my bff  for life was in town from b-more for a little summer vacay, we got down to business. trips to jamba, endless wine and crafts were on the agenda; a little #retromtv didn't hurt either...

oh the hills; this is where the LC love all began...

so while we sipped on some sauvignon blanc and recounted the nostalgia of our college dorm rooms, we multi-tasked our way straight to crafting heaven... we made bracelets!!!  we got the idea here, but made a few modifications...


crafty necessities {yields: amazing accessories}
waxed linen cord - a 24" piece and a 17" piece
beads of your choice - we used 6/o size
10 mm button, two holes


please notice my beautiful puppies in the background; they are very supportive of crafting.  
1) cut two strips of the linen cord, one 24 inches, the other 17 inches {longer if you want a looser bracelet}. 
fold the longer strand in half, then match one end of the 17" strand with both ends of the 24" strand. fold the leftover length from the 17" strand over the folded piece; this will create two parallel loops {see above}.


2) tie a knot about a half an inch down; i did this as a slip knot. you want a big enough space for the button to be able to pass through...


3) cut the shorter fourth strand off so that you are left with three equal lengths


4) start braiding the strands; this can be as long or as short as you want, depending on how many beads your would like to have...


5) start braiding in the beads, starting with the outermost left strand an crossing it over the middle strand, then the outermost right strand.


6) as you continue to cross, the braid should naturally hold the beads in place.


7) this can be as loose or tight as you would like...


8) once you have the amount of beads you desire, braid the strands again; this should be equal length as the initial braid you did to start the bracelet. tie a regular knot on the end.


9) slide on the button...


10) tie another regular knot and snip off the excess length...

a "dollah" makes her "hollah"...

i need to speak to the person who allowed this child to have her own show on TLC...


lord help us all.  reality TV has hit a new low.

August 7, 2012

extreme makeover: office edition

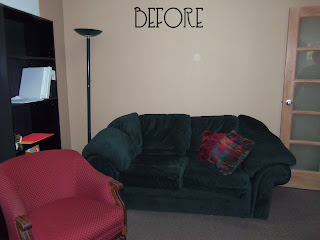
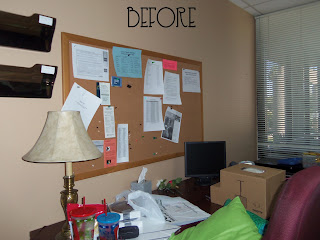
so almost three months ago i began a new job {yay!}, and it was quite a change from spending the majority of my days therapizing people to managing people.  needless to say, i spent most of memorial day weekend taking my new digs from drab to fab without breaking the bank...

a trip to everyone's favorite place, ikea, and some reinforcements from QT made it all possible, along with a few homemade touches courtesy of yours truly!


notice this hideous green couch. it used to be in my possession, until we moved offices and i made a strategic argument for a larger couch. unfortunately now i have re-inherited it... what to do?


three large whiteboards take up one wall of my office; not magnetic... fail!


enter said mentioned QT reinforcements.

it's super important to me to love the spaces i spend a lot of time in.  namely my living room and my work space.  i thoroughly enjoy spending my days in my new, amazingly awesome office... 


August 5, 2012

scrap, paint, peel, repeat

craft days are exceedingly becoming my favorite days.  i'm as excited about craft days as debbie phelps is about another gold medal {see, exhibit a}...

exhibit a: thanks ryan seacrest

while my enthusiasm about crafts is not nearly as significant as literally peeing yourself over an Olympic three-peat, i'm willing to let go a bit and just enjoy making a mess in a different way.  cut to me: buying canvas and finally busting out those 6 months worth of magazine subscriptions that i never read but were too cheap not to purchase on amazon. fabulous.

crafty necessities {yields: 1 one-of-a-kind decor}
canvas, in a size of your choice
acrylic paint, in a color or colors of your choice
magazine clippings
modge podge
letter stickers {i would recommend using vinyl letters, as the stickers proved problematic}

i did find this marvelous idea on pinterest over at southern belle soul, and she had some cute ideas for variations on this project also.  however {because i apparently can't read and shop at hobby lobby at the same time} i went rogue and did not use vinyl lettering as suggested, so please do that if you attempt this...


start by cutting out random, colorful scraps from your magazines. i tended to gravitate towards patterns and words. {hindsight tip: the smaller the scrap the better, you will get more variety on your lettering!}


working slowly, modge podge the canvas and arrange the scraps to cover it entirely, then modge podge over the scraps. i had to go over it a few times to get the scraps to stay flat.  be strategic about your placement in regards to where you will be placing your letters.


i used the most advanced of tools {a ruler} to space out my wording on the canvas, and applied the stickers


paint over it in whatever amount of thickness you prefer; i wanted the scraps to show through, so i did one layer of paint. let it dry completely.


peel the stickers off {carefully} and boom, instant art !

August 3, 2012

snapshot

that's it. i'm getting an iPhone. my andriod-loving boyfriend may disown me, but damn can that thing take great pictures. as much as i love the shots that come from my droid, i can only imagine how these babies would look with some apple technology behind them...


and that's all my instagram has to say about that.